Happy Easter - can't believe that it's here already this year!

I do love a fancy fold so this is a fun card.
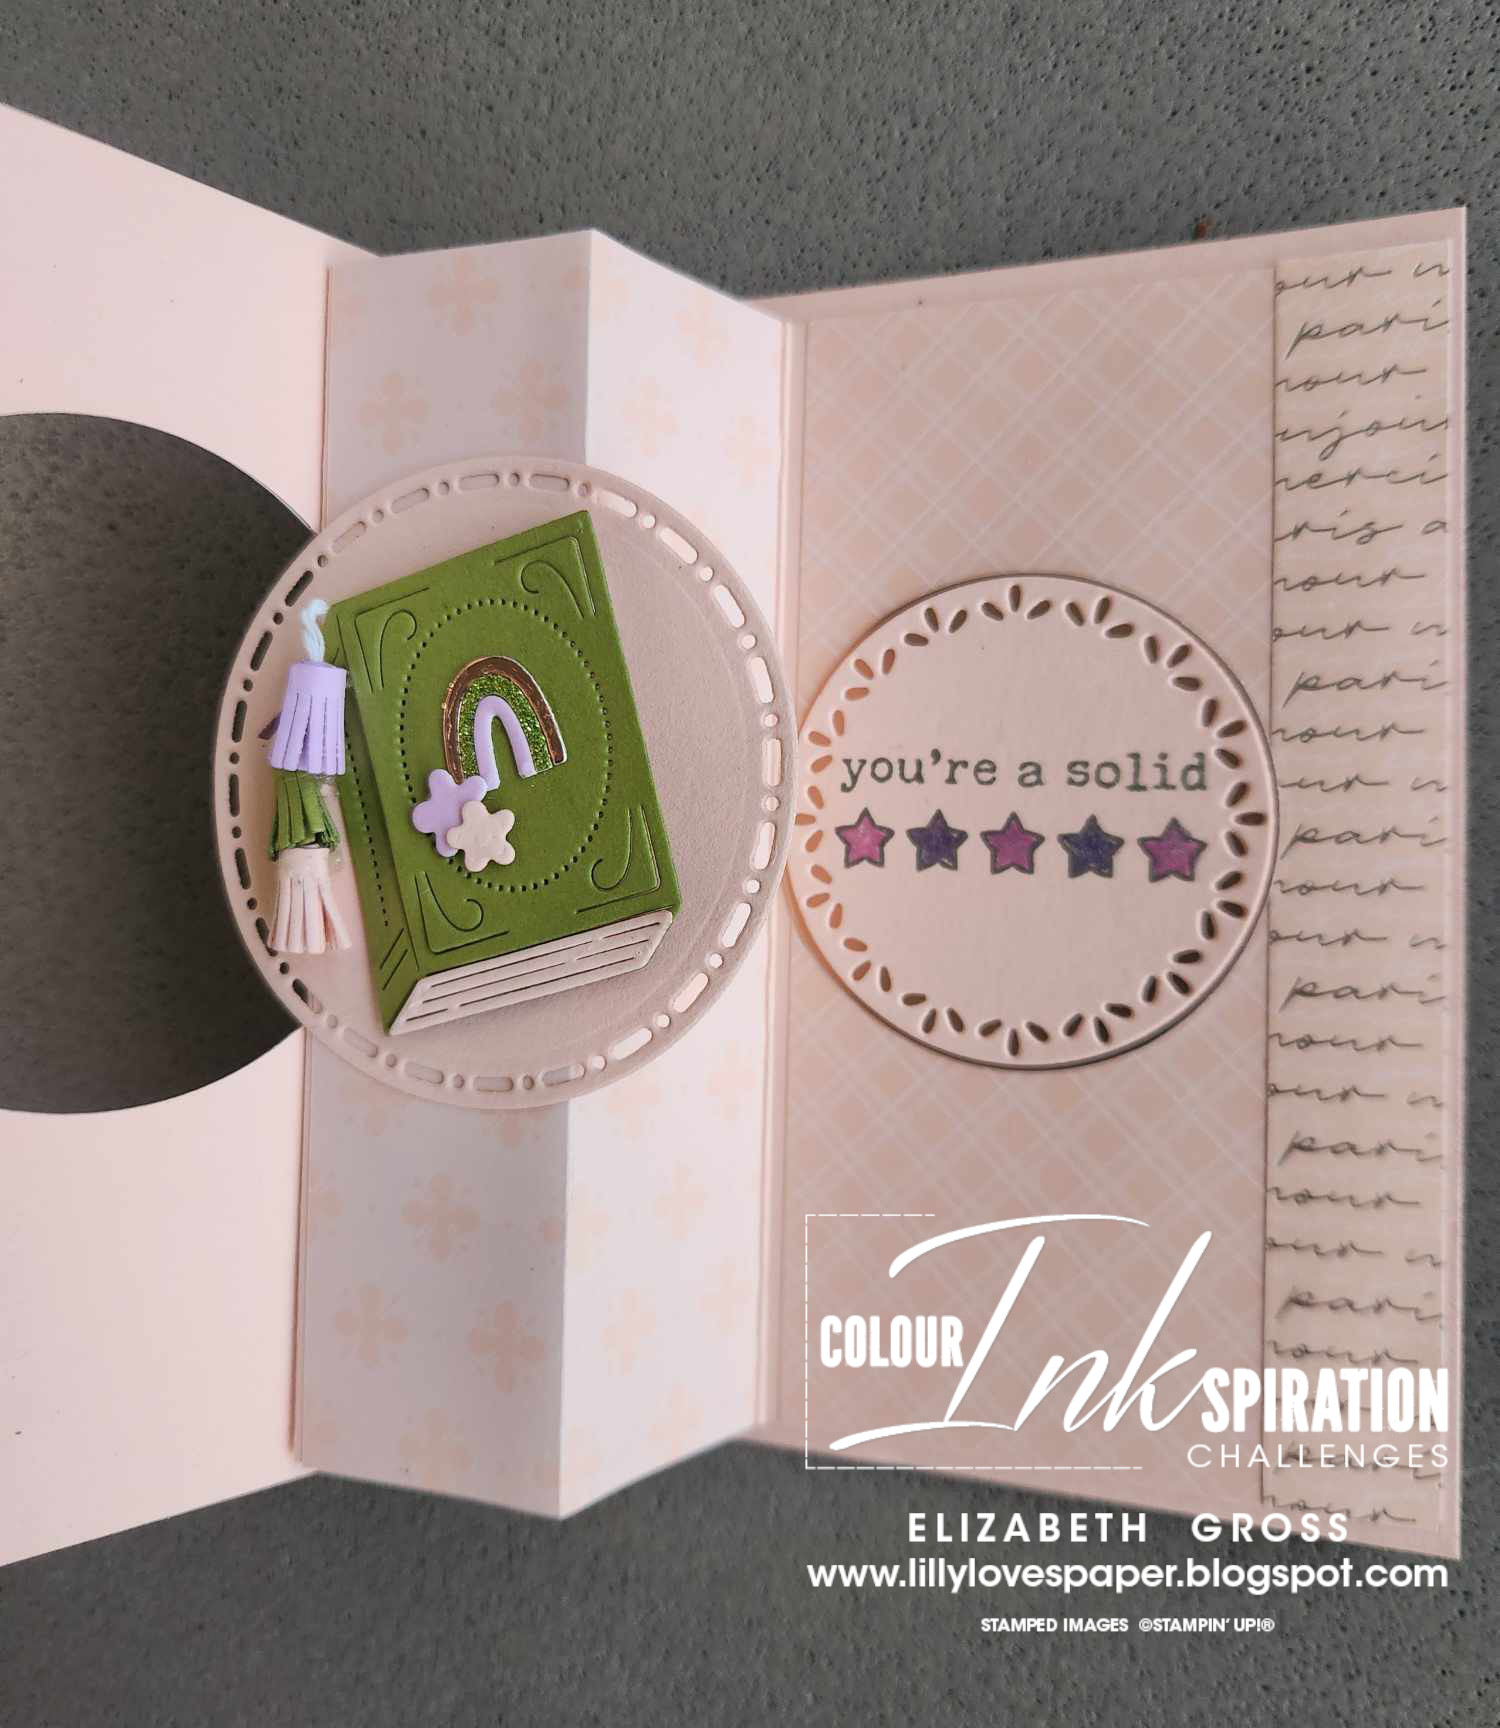
Sadly, the "For the Books" Stampset and dies are retiring but I will be keeping them in my stash. How cute are the little tassels?
You can still purchase these and there are loads of other retiring specials available.

The Rainbow and teensy flowers are from the Thoughtful Moments dies, and perfect for my card.

Welcome back for another challenge at Colour INKspiration. How cute is this week's colour Inspo pic?

Picture credit - https://silvitablanco.com.ar/conejos-con-corona-de-flores-laminas-y-posters-gratis/

And a special welcome to Gail Ellis who was selected from a previous challenge to be our guest designer. Her project is stunning so do check it out.
Check out the Facebook group for some more inspiration using these delightful colours. And don't forget to share a picture of what you create using them. We just love to see how many different designs can be created using the same colours, it's so interesting.
I have created pop up cards like this in the past, but this is a slightly different method which I saw on You tube.
Dimensions / instructions for this card:
- card base 5 1/2 x 8 1/2, scored at 4 1/4
- DSP for card front 4 x 5 1/4 - apply adhesive only around the edges and then die cut circle from centre cutting through both layers, set aside
- Cardstock for box / pop up support 51/4 x 61/2, score along long side at 1 1/4, 2 1/2, 3 3/4, crease to form box mechanism
- adhere first face of box to inside of card front being careful where the adhesive goes. Then fold up box mechanism to flat and apply adhesive to the largest panel, close card over and adhere.
- DSP for box mechanism 5 1/4 x 2 1/2 fold in half lengthwise, adhere to box section, Second piece same size to adhere down over inside, strip 1/2" x 5 1/4 for decorative edge
- stamp and decorate embellishment for front circle and adhere
- DSP for back panel for writing 5 1/4 x 4
- whisper white panel 5 x 3 3/4
The only tricky part is where to apply the glue under the front feature circle - you don't want it to get stuck to the moving parts.
The top view gives a clearer idea of how this one works.

And of course you need somewhere to write your message. I've decorated a panel for the back of the card. Again, the tiny elements are from the dies for Thoughtful Moments.


It might be easier to watch the YOutube video by Trevis here.
And here's a little clip of mine opening up.I hope you have a creative week and remember,
"don't just post online,
post something pretty!"
cheers, Liz
Comments
Post a Comment
Thanks so much for taking the time to comment. I really appreciate it,
In line with new Data Protection legislation (GDPR) by commenting you do so in the knowledge that your name & comment are visible to all who visit this blog and thereby consent to the use of that personal information for that specific purpose.
Liz