Hello and Welcome to the second Colour INKspiration blog. What an exciting concept we are enjoying by using the Facebook page for your entries into the challenge. So much sharing of ideas and creativity. It's so energising!

 .
.

This little station invites you to write a little note describing something you are grateful for and storing those moments of gratitude so you can read them later when you need some help with perspective and mindfulness.
 The Oh So Succulent stampset is absolutely fabulous, and I was inspired to create a 3D Succulent Garden. The Succulent Garden framelits make it really easy.
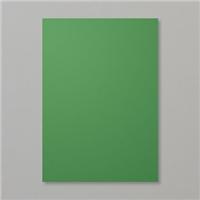
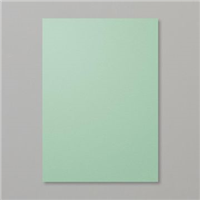
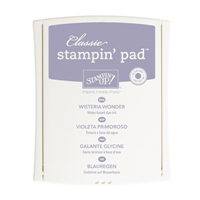
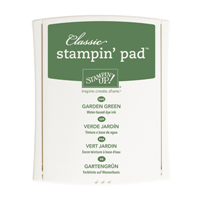
I have used Garden Green sponged on the edges with White Craft Ink, and Mint Macaron for the second two plants sponged on the edges with Wisteria Wonder.
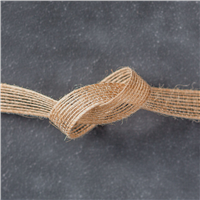
They are glued in place on a large raw timber block which has been wrapped in Burlap ribbon and White Baker's Twine.

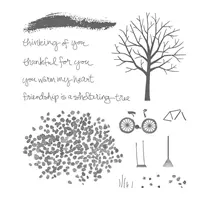
The little blocks are stamped individually using a very old (long retired) Stampin' Up! alphabet, and glued together with aquadhere. Some of the layers of blocks have their faces swiped in the Garden Green stamp-pad. The mini pail of gratitude notes have the "thankful for" sentiment stamped from the Sheltering Tree set, and the pencil has garden green baker's twine adhered to the end, while the pencil itself is wrapped in some Washi from the new Urban Underground suite, and tied to the bucket so there's no excuse!!
I made lots of string wrapped jars for Christmas decor (you can see more here), and this one has the lid decorated with two card circles and stamped with the gratitude sentiment from Grateful Bunch.
It has the cute little notes from the Lift Me Up set stuck to the front. These 2 stamps don't catch your eye when you first look at that set but I am finding them really useful.


And just how gorgeous and On Trend is this inspiration pic!
 .
.
I have created a little "Gratitude Station" in a frame for my daughter as a house warming gift. It's a simple frame with a simple message. I read about a friend who spent last year writing little notes to describe a moment of happiness, storing the notes in a jar, and reading them all in the New Year to start her year with happy memories. It sounded like such a great concept.


I have used Garden Green sponged on the edges with White Craft Ink, and Mint Macaron for the second two plants sponged on the edges with Wisteria Wonder.
They are glued in place on a large raw timber block which has been wrapped in Burlap ribbon and White Baker's Twine.

I made lots of string wrapped jars for Christmas decor (you can see more here), and this one has the lid decorated with two card circles and stamped with the gratitude sentiment from Grateful Bunch.
It has the cute little notes from the Lift Me Up set stuck to the front. These 2 stamps don't catch your eye when you first look at that set but I am finding them really useful.

Thanks so much for looking, I hope to make another one using the popular Kokedama style for my next garden.
We'd love to see what you create this fortnight using the colours for inspiration, join our Facebook group if you are not already a member. If you would like this suite of products for yourself just click on the image of the set below to take you directly to my online store. The bundle alone is close to the $90 needed for a free Sale-A-Bration item so it's a great time to take advantage of this great offer.
Next on the hop is the amazing Lou Kitzelman who already has some amazing creations with this suite in her stable of achievements.
thanks for joining in,
Liz


Such pretty projects! I love them! That jar and notes are adorable!
ReplyDeleteThanks Mel, it was fun to make. - a new take on the gratitude Journal.
DeleteLove your project! How awesome is it when we can use our supplies for "Off the Page/Card front" projects. That gift is going to give a lot of joy!
ReplyDeleteThanks so much Megan. I've already had one order for another one! Think those succulent framelits will be a good investment!
ReplyDeleteI am literally sitting with my mouth open!! This is fan-tas-tic!!! What a truly wonderful housewarming gift...love it, thankyou for sharing xox
ReplyDeleteThankyou Deli.
DeleteOh my.....so many pretty elements to your projects. I love the whole idea of this Elizabeth. Your little jar is gorgeous.
ReplyDeleteThanks so much Lou, I was really happy with how it came together.
DeleteSuch a wonderful idea and gift, one that will keep giving each year! Thanks for sharing.
ReplyDeleteWow what a lovely project!! I'm sure it has pride of place at your daughter's place. Gorgeous as always!
ReplyDeleteThanks so much Bec.
DeleteWhat a sweet idea and gorgeous projects !
ReplyDeleteVery sweet of you to say so Cheryl, thanks so much.
DeleteAwesome idea... Gratitude station! Those succulents are amazing.... Well done with this project!
ReplyDeleteThanks so much Rose, l am very touched by all the lovely comments
DeleteWhat a beautiful display you've created, Liz. I love this idea. x
ReplyDeleteThankyou Patrice, I thought about it for quite a while before I put it together
DeleteTotally brilliant. Fabulous project. The idea and the elements are all amazing.
ReplyDeleteThankyou for your kind words Julia, you have all just made my day.
DeleteBeautifully done Liz! So many lovely details and such a lovely display.
ReplyDeleteI've heard of the notes in a jar before - but your presentation takes it to a whole other level Liz. Such a wonderful gift! Kelly x
ReplyDeleteWow! Liz, this project is AH Mazing! What a beautiful gift.
ReplyDeletewow, that is so Kewl!
ReplyDelete