Layering Leaves Gatefold card

 Fancy folds are such a great way to add extra creative dimension to any card.

A GATE FOLD is any fold where 2 flaps fold over the card base - one from either side.

The size of the card base determines your finished size.
There are many different variations.
The flaps can be 
-the same size
-one large and one small
-one full width (Ie height of the card) and one narrow ( less than full height)
- any combination that works for you
Typically there is a feature element adhered to the front of the "left gate" which overlaps the "right gate"

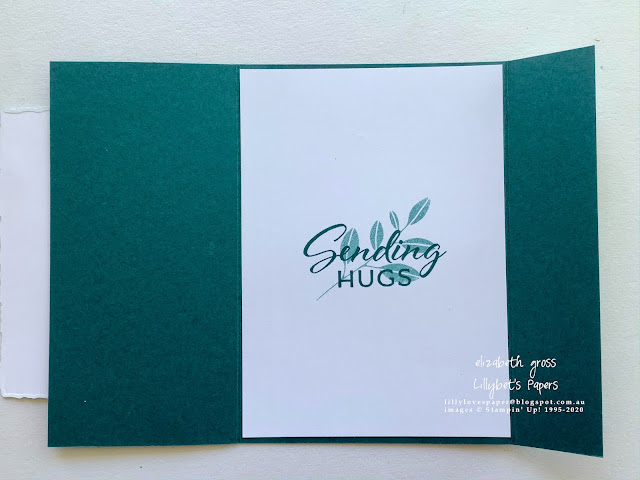
For this card I started with a card base 14.5cm x 21 cm
scored at 3cm and 13.5cm
The strip of foil is a whisker narrower than 3 cm, and the opposing gate is decorated only with some tone on tone stamping.
The feature panel for this card is approx 7 x 10cm and is cut with one of the deckled rectangles, but it can be any size that works for your elements. I wanted something long and tall to accommodate my vase of greenery.


The gorgeous bottle is created using the Vintage Bottle Punch and I like to put a tiny "keeper" as a holder for the decorated feature panel to tuck in behind to keep it closed. In this card I have used the Best Label punch and some of the gorgeous Soft Shimmer Paper

The foil is a returning product which you won't find in the catalogue as it is available only as on online product. It is called Dry Brushed Metallic Specialty Paper.

You can find the full range of Stampin' Up! products in my online store here.


These are more details of those beautiful products


I hope you have a creative week and remember, 
"don't just post online,
 post something pretty!"
cheers, Liz

Comments

Popular posts from this blog

Envelope Dies perfect for an Acetate Tent card and some new DSP

After creating yesterday's cards I was on a roll and created this one using the beautiful Gilded Autumn DSP and the Fancy Phrases stamp set.  I really love the sentiments in this set.  It is such a simple design and easy to create. You can find all the directions on yesterday's post for Just Add Ink (JAI#518)  I watercoloured the white leaf after I had adhered the gold veins just to soften it, and I added a strip of mint DSP to the front of one of the tent stands as the white was a bit stark. That's the cool thing about this design, you can change it up plenty of ways. I'm sure we can all send these type of cards at the moment. I hope you are safe and well, and staying connected, wherever you are. I hope you have a creative week and remember,  "don't just post online,  post something pretty!" cheers, Liz Product List Ornamental Envelopes Bundle [ 155168 ] $83.50 Envelopes  Dies [ 153531 ] $63.00 Shimmery White A4 Car...
Funky Folds Blog Hop= a Bay window card using Country Flowers

Well it's been a very long time since I participated in a blog hop - and it feels good to be participating in a FUNKY FOLDS hop. You may have come from Jan McQueen's creation, or you may be starting here. Be sure and hop all the way around. I do love Fancy Fold cards and of course with a new catalogue and new products it is fun to be creating again. I have a big weekend retreat coming up in a few weeks and we are using the Country Flowers Stamp set so I am creating a swag of samples. Since time is such a precious commodity for all of us I am using some old favourite folds with new products - a whole new lease on life. For this week's hop I am revisiting the Bay Window Card. The front tri-panel piece bends forward and tucks in behind the little anchor which is fixed to the inside. Your card will stand up unaided. This is it with the edge tucked under the anchor. You can find the measurements and instructions and several previous samples on these pages. Today's card featu...

CTC#116 Inspired by Pages 20-31

Welcome back of another week of CTC. This week we are CASEing quite a big section of the catalogue-pages 20-31, which includes the Oh So Succulent suite. I love the succulent set but need a lot more time to play with it. (I'm sure you can all relate to that!) I also love little square notecards like the one on page 31, so I had a little play and this is what I came up with. This week I've done the step it up system again. This is a lot of fun and a process which can help you analyse your own style and how to adapt that for classes or workshops to appeal to a wider range of styles. This week I am stepping it up from simple stamping directly onto the notecard, then building on that with another colour, added layers and embellishments. Although the twine doesn't carry through from the base card it needed a little bit of black to tie them all together. Beginner Crafter  - very simple stamping and minimal supplies - 1 colour of Cardstock (Thick Whisper W...