Welcome back for CTC#135 which focuses on the Holiday section of the catalogue.
I know I should think about getting ready but I just can't do the whole Christmas in July thing! However, I did like a few layouts in this section and have gone with a simple layout - which is in the banner picture this week - and a brand new set which has been on my wishlist since I first saw it in the catalogue.
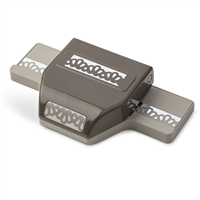
That cute little pink border is from one edge of the Decorative Ribbon Border Punch. I love that you can use either the lacy looking edge or this more simple small scallop. If you are tossing up between the ticket edge punch then this one might be an alternative because it gives you 2 options for quite different looks. I love versatility. Thankyou Stampin' Up!
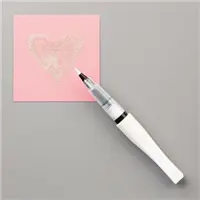
Not sure if you can pick it up but I've done the "Sara flicking trick" with the clear wink of stella to get some tiny glimmer dots. - you flick the brush tip against the rim of the cap-from inside the cap to get ink splatters.
I know I should think about getting ready but I just can't do the whole Christmas in July thing! However, I did like a few layouts in this section and have gone with a simple layout - which is in the banner picture this week - and a brand new set which has been on my wishlist since I first saw it in the catalogue.
I just love the 3 pinecones stamped beside each other, with a simple banner sentiment and a bit of string, super sweet. (page 121) And using any cute image you'll have a great quick card to send.
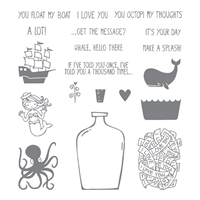
All the images in the Message in a Bottle set are sweet and stamping the inside was quick and easy. I am finding that I really love the Photopolymer sets these days - I know...I'm a slow adopter of change!!! But positioning the images is so easy to get the hearts completely inside the bottle
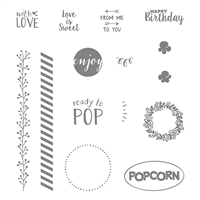
And since it is supposed to be a Christmas theme I thought I would do another of the same layout using a set not designed for Christmas - the Ready to Pop set is one of those that it is easy to look past. It's what I would call a BP set ("the quiet achiever"!) I love the little wreath, the happy birthday sentiment is brilliant, there are 2 great border stamps - including the stripes on this card- a round 'enjoy' stamp and I have cut the word"popcorn" out of the oval and just use the oval border. -it's also really affordable at only $28Au. It's on page 26 of the catalogue and I'd recommend adding it to your stash. If you click on its image at the bottom of this page you'll see it in more detail.
The sentiment for this card is from the hot air balloon set "Lift me Up" but I think it fits for Christmas. And you can see I've used the Decorative Ribbon Border both ways on this card.
Not sure if you can pick it up but I've done the "Sara flicking trick" with the clear wink of stella to get some tiny glimmer dots. - you flick the brush tip against the rim of the cap-from inside the cap to get ink splatters.
So I admit that I don't do Christmas in July but I've just seen the special offer from Stampin' Up! and I think that you definitely should.
If your wish list is a mile long (whose isn't?) then you are in for one of the most generous offers I've ever seen from Stampin' Up!
If you join in July you get the same great offer - spend $169 dollars and choose $239 worth of product- any combination of products you like, with the ongoing discount.
AND you also get all of the following (worth another $121)
- 2 D blocks 7.3 x 6.8cm $14 ea (p217)
- Grid Paper A3 100sheets $19.25 (p217)
- Paper Snips $17 (p204) (these are the absolute best!)
- Snail Adhesive(12m) $10 (p202)
- Bone Folder $12 (p202)
- AND the BRAND NEW Christmas Stamp Set Carols of Christmas
This new stampset has a whole matching suite of products which will be added later
What an amazing offer. If you think this appeals to you - and you are not currently a demonstrator then I'd love to have you join my team and take advantage of this great offer. It's super easy to become part of the fun.
There are many benefits to being a demonstrator, and there is no obligation to chase a business path, most of my team are very happy Hobby demonstrators and joined purely for the discount. Being part of a team of fellow paper enthusiasts is an added bonus, we have a lot of fun together supporting each other.
If you'd like to know more just contact me anytime at lillylovespaper@gmail.com or through my Facebook page Lillybet's Papers
Maybe you just need to give yourself an early Christmas Present!
It's so nice to have my stamping friend and fellow Central Qld stamper back in the groove this week. I always learn something from Krissy. And next this week is the lovely Rachel
Don'f forget we'd love to see what you create inspired by the images on pages 112-125. Pop your photo on the Facebook page.


Thanks for hopping along this week,
and remember,
"don't just post online,
post something pretty!"
Liz




Wow. Again another reason to love our blog hop. I didn't notice this card and layout in the catalogue so thank you so much for CASEING it! And Thankyou for the great tips about the ribbon punch and the stamp set! Great case.
ReplyDeleteThanks Julia, yes I learn something new each week too. Great to be part of this crew
DeleteTwo lovely cards, I love splattering Wink of Stella on my cards but it never shows up in photographs quite right! Would be so pretty in person though.
ReplyDeleteThanks Monique, yes photography is a skill I would love to improve on, but glitter is always better in real life
DeleteLovely cards Elizabeth! Love your CASE - I hadn't even noticed that card.
ReplyDeleteI know, the catalogue is such a treasure trove
DeleteGorgeous Liz! Love the messages in the bottle - and doubly as excited because the parcel lady delivered that set to me today!!! Kelly x
ReplyDeleteWOW... Love the message in the bottle that you made for Caseing the catty <3 <3 <3
ReplyDeleteI am yet to get to do one of these weekly challenges...
Can't wait to get together again on Thurs night and Saturday
Cheers Shaz
Beautiful cards Liz. Love the touch of Stella using Sara's technique, and I love the trick using the boarder punch. I had no idea how they did that in the Catty .. now I do! Thanks!
ReplyDeleteWhat a cute card, I need to check my catty for this set!
ReplyDelete