The Mini Bendi Card has been around for a long time and it appeals to me because it's so simple and something a little bit different.
It fits easily in a regular envelope and it stands up on the desk for your recipient to admire.
And it feels a little bit clever to create something like that!
We did this one at class recently using the Country Bouquet Bundle.

2022 cards.


I created a bunch of these cards last year but never wrote them up at the time, so today I am sharing some newly created versions as well.
This is a picture heavy post so you can see how it fits together.
As usual I like to create a metric version and have written up both metric and imperial measurements to make life simple.
METRIC
Material Dimensions Notes
Cardstock for Card Base 10.5 x 15cm score at 7.5
DSP for card Base 10 x 14.5cm score at 7.25
Cardstock for Bendi Panel 3.5 x 17cm score at 1cm from each end
DSP for Bendi Panel 3 x 15cm
Centre Pop-Up Mechanism 5.5 x 11cm score at 1, 5.5 and 10 cm
DSP for Pop-Up Mechanism 5 x 9 cm score at 4.5
White Cardstock 7 x 10cm cut x 2 panels for message on reverse
Floating Panel if using approx 7 x 10cm diecut rectangle/ label
pop up mechanism for floating panel cut 2 strips card 2 x 6cm, score at 3
ASSEMBLY
- adhere DSP to Bendi strip and to Pop up mechanism
- fold and burnish all flaps
- Align Bendi strip with lower card edge. Adhere side tabs folded back keeping fold flush with left and right card edges. This is the piece which gives the card the stability to stand up
- Adhere DSP piece to card base. It will cover over the small tabs from the Bendi strip. Use liquid glue and position DSP with even border of Base Cardstock visible around the edges
- Position pop up mechanism 1.5 cm below top edge of card. Align centre folds. Fold side tabs behind panel and adhere one at a time. This piece will sit forward from the card base ( like an open book with the pages facing the card base and the book cover facing the front of the card ) You can leave the card as is and decorate with embellishments to any of the surfaces so they stand up.
- OR If using Floating Panel follow these extra steps. Take one of the two small strips which have been folded into a "V". Align the Fold of the V with the Centre Fold of the Pop-Up Centre Mechanism, about 1cm down from the top and adhere the back leg of the V. The front section will be floating free Repeat for the second "V" strip
- You can now adhere the Floating Panel to these "front legs" of the V pieces. It will sit forward from the mechanism
A picture is indeed worth a thousand words so here is how it goes together:

View from the top when finished

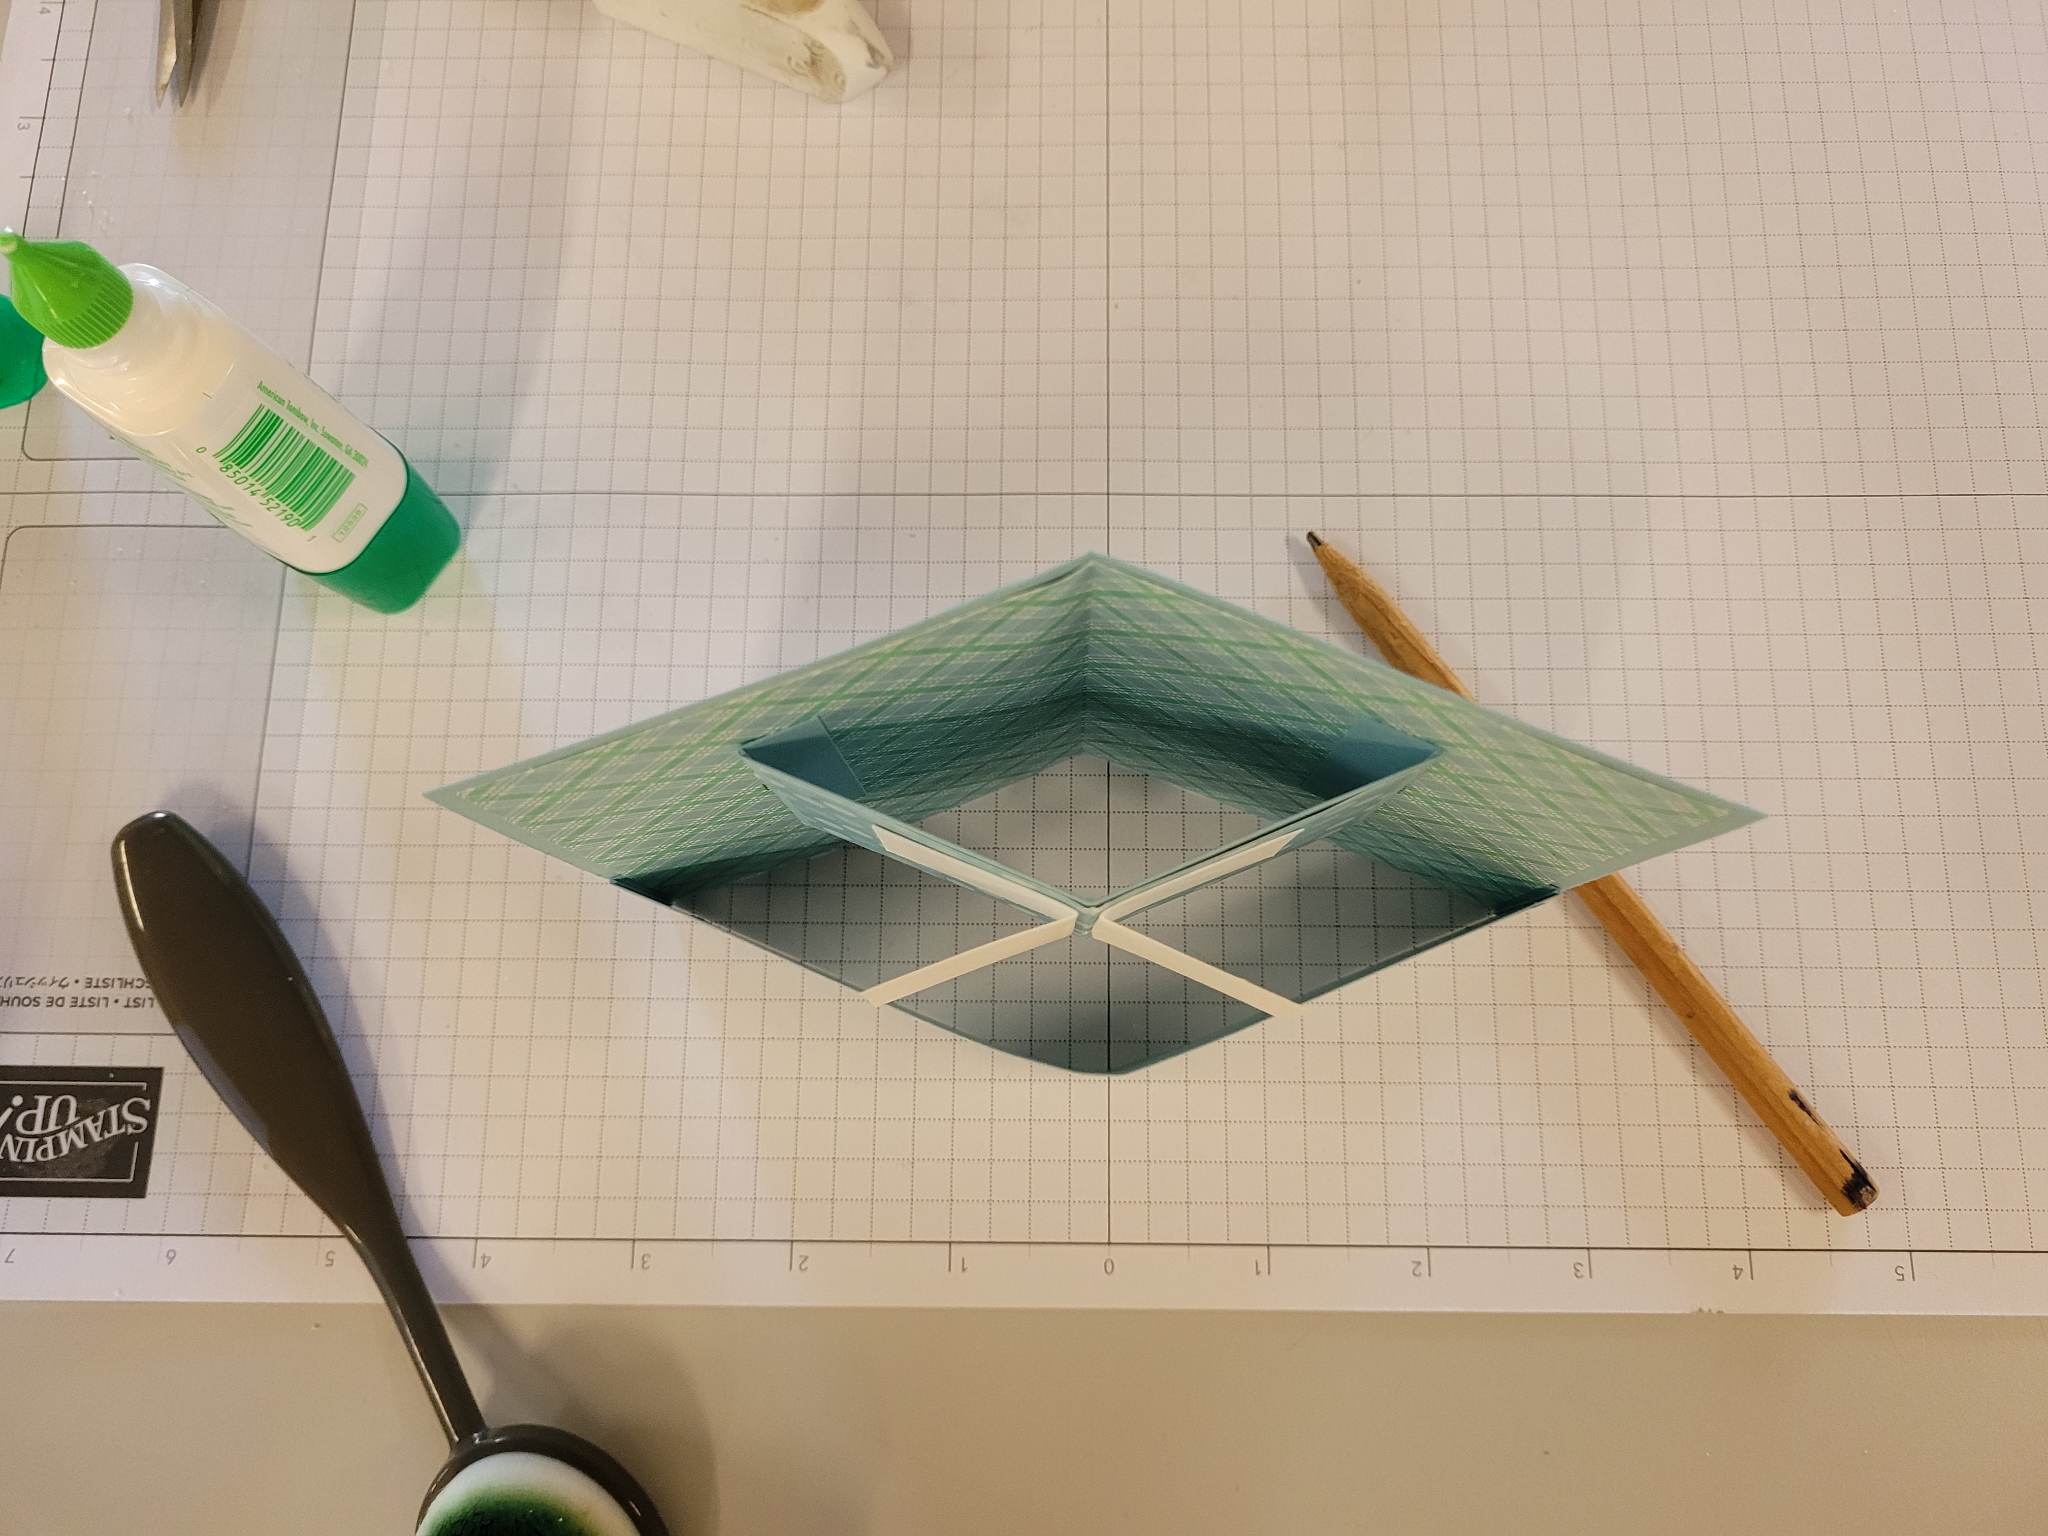
The DSP pieces are not yet adhered to their panels but this is the basic assembly. Note the 2 white "V" pieces which allow your floating panel to "float"

Adhere the Bendi Panel to the Card Base before you add the background DSP so that the DSP will cover those side tabs

When you have the position identified for the Centre Pop-Up mechanism adhere the side tabs one at a time. I have only stuck down the first one in this photo

The first of the "V" pieces with centre fold to centre fold.

Before I've added the floating panel but with the "V" hinges ready - they are sitting forward a little in this angle, but once I press the panel onto them they will adjust.


IMPERIAL
Material Dimensions Notes
Cardstock for Card Base 5 1/2 x 4 1/4" score in half
DSP for card Base 5 1/4 x 4" score in half
Cardstock for Bendi Panel 1 1/4 x 6 1/2" score at 0.5" from each end
DSP for Bendi Panel 1 1/8" x 5 3/8"
Centre Pop-Up Mechanism 2 x 41/2" score at 1/2", 21/4" and 4"
DSP for Pop-Up Mechanism 1 7/8" x 3 1/2" score in half
White Cardstock 2 1/2 x 4" two panels for message on reverse
Floating Panel if using 2 1/2 x 4" diecut rectangle/ label
pop up mechanism for floating panel cut 2 strips card 3/4" x 2 1/2
score in half.
- I used the tutorial at Split Coast Stampers here for the basic card
 |  |  | |
 | |||
 |  |  |


The Dandy Designs paper is a SALE a BRATION item and will only be available until the end of Februay. It is Free with a qualifying order and is 48 sheets of gorgeous 12 x 12 paper. Let me know if I can help you order some.
I hope you have a creative week and remember,
"don't just post online,
post something pretty!"
cheers, Liz
Comments
Post a Comment
Thanks so much for taking the time to comment. I really appreciate it,
In line with new Data Protection legislation (GDPR) by commenting you do so in the knowledge that your name & comment are visible to all who visit this blog and thereby consent to the use of that personal information for that specific purpose.
Liz